We have just returned from a fabulous trip to the USA. It was a fabulous trip for many reasons but here I will write about the fabulous thing I found whilst wandering the aisles of Wallmart looking for Fritos.
O-balls...in the childrens toy section for a couple of dollars. Found here.
The design of O-balls means it can be used to scaffold the skill of catching. It allows the learner to grasp the ball upon contact with much greater success. Whilst they do roll away once dropped, they do not bounce all over which means less time chasing the ball around. They can be used instead of tennis balls in many throwing and catching games and activities.
Discourage the hooking of fingers through it whilst throwing.
I loved them so much I bought four of them. I highly recommend them.

Showing posts with label throwing. Show all posts
Showing posts with label throwing. Show all posts
Wednesday, September 29, 2010

Tuesday, September 7, 2010
Balloon Covers
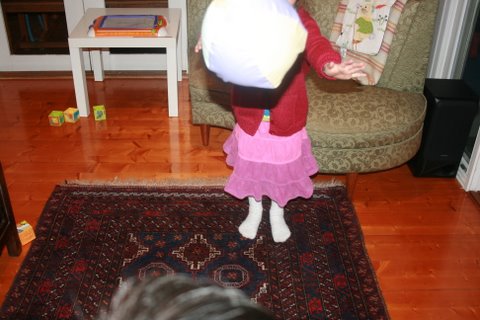
Some readers may have guessed that the ball used in yesterday's post (No Chicken Wings! September 6th 2010) was not a ball at all.
It was in fact a balloon inside a homemade balloon cover. This is, in my opinion the essential tool for scaffolding the learning of throwing and catching for toddlers and preschoolers.
I am a fan of balloon covers and have two to giveaway. The best comment/feedback about this blog between now and next Tuesday will win a Balloon Cover.Please include your email so I can contact you.
Looking forward to hearing from you.
It was in fact a balloon inside a homemade balloon cover. This is, in my opinion the essential tool for scaffolding the learning of throwing and catching for toddlers and preschoolers.
 .
.- Balloons inside a cover makes it slightly heavier but still retaining its loftiness. This gives the learner - whose ability to track the ball with their eyes is just developing - greater success at following the ball into their hands.
- Being soft and light, when the ball is headbutted, it does not derail the whole experience.
- When the balloon bursts - it will be loud but not likely to cause any other injuries. The knot can be tucked or hidden away - this is not shown in the picture above. (N.B. take care to account for all pieces of the balloon if it does pop - choking hazard).
- It can be used safely indoors which facilitates practice any time.
- Balloons and its cover take up very little space making it an ideal item to pack on excursions and holidays.
- Homemade balloons can be made to size.
I am a fan of balloon covers and have two to giveaway. The best comment/feedback about this blog between now and next Tuesday will win a Balloon Cover.Please include your email so I can contact you.
Looking forward to hearing from you.
Monday, September 6, 2010
"No Chicken Wings"
I taught my Preschooler the chest pass just after her third birthday. As soon as she showed a hint of interest, I pounced on the opportunity.
I am often surprised by the number of 6, 7 and 8 year old girls fumbling and being ill at ease when they have a ball in their hands, so I wanted to get this one right for my preschooler. Girls who do not have sound ball skills by Year 3 show reluctance to take part in games and activities due to their feelings of incompetence.
I think the chest pass is the ideal starting point when it comes to the teaching of throwing. Here is why.
Even in the first stage of learning this skill (cognitive stage), learners can use it in games and activities. It requires both hands and develops upper body strength evenly. It can be easily mastered and subsequently, gives the thrower a great early boost.
Some pointers:


I am often surprised by the number of 6, 7 and 8 year old girls fumbling and being ill at ease when they have a ball in their hands, so I wanted to get this one right for my preschooler. Girls who do not have sound ball skills by Year 3 show reluctance to take part in games and activities due to their feelings of incompetence.
I think the chest pass is the ideal starting point when it comes to the teaching of throwing. Here is why.
Even in the first stage of learning this skill (cognitive stage), learners can use it in games and activities. It requires both hands and develops upper body strength evenly. It can be easily mastered and subsequently, gives the thrower a great early boost.
Some pointers:

- Choose a soft, light ball that is their chest size.
- Hold the ball with the fingers spread out and pointing up.
- Begin with the ball held at chest height and close to the chest.
- Keep elbows comfortably close to the body; "no chicken wings"
- Push the ball to the target.
- Point the fingers at the target after the ball is released.
- I would add "step when you throw" at Prep level or when outside (heavier) balls are used. This is where the weight is transferred from the foot at the back to the dominant foot out in front.
- Throw the ball against the ball; aiming at a target
- Play two-person poison ball - ask them to throw the ball at you...and if they hit you with it...it is a point to them. Change the rules to make it harder or easier as their skills progress
- .Throw whilst sitting, kneeling and standing and standing on one foot,
- Throw for distance; measure the distance by doing the Heel Toe walk
- Always demonstrate and model the action - 'do as you say/say as you do'
Subscribe to:
Posts (Atom)